Build a Blog on React: Step-by-Step Guide With Examples
Introduction: Why Build a Blog App With ReactHow to build your own React-based BlogInstalling Node Package ManagerWorking on src folder and package.jsonCreating a GitHub RepositoryCreating a homepage of the React Blog AppSetting up Blog’s detail componentCreating the Create ComponentFinalizing the useFetch hookSetting up the leftover componentsSetting up the JSON serverHow to Create a Blog With Web App GeneratorConclusion
Table of Contents
Introduction
As we all know, thanks to the old saying, the pen is mightier than the sword. And that is definitely true on many occasions, with an exception of, perhaps, an actual sword-on-pen fight, but we digress. The point we are conveying here is that speech and information are not just a way of sharing ideas, but a powerful tool, which you should employ to your advantage. If we get back to the metaphor, the pen is indeed mightier than a sword, as it can help you raise a thousand swords back in defense. Do not get us wrong, words should not be weaponized, as their true power lies in their force of creating and making the world a better place and that is how they should be used.

Another reason why the information is important and mighty lies in the stipulations of the modern world and modern society. We said it many times, but it bears repeating – our world nowadays is information-based, meaning that it is one of the most powerful and useful possessions one can have.
“That’s all good and somewhat poetical, but what does it have to do with building blogs on React?” – you might think. The answer is simple: a blog is an effective tool for spreading information if done and maintained correctly. And React is one of the best ways to get it right. And in this article, we would like to take you on a little tour that will help you understand the process of building a blog on React, creating it step-by-step with us.
So, let’s not postpone the beginning of our tour any further and get down to it.
How to build your own React-based Blog
The first stop on our React-based blog building tour would be describing and picturing what we are going to have in the end. And, what we are going to have, is an extremely simple blog website that will have quite a small toolset and lacking functionality. But nonetheless, it will be most open to improvement due to, in no small part, its simplicity.
Next, let’s discuss what features our React-based Blog would have:
Ability to add and delete blogs;Fetching and displaying details about each and every individual blog;Fetch blogs from a local JSON server. They would also be displayed in a list form;This would be a purely React-based blog and there would be no back-end servers used.
It means that all the changes made on the page of the chat would not be saved and we will see the blog in its default state with each refresh of the page.
All of these features are aimed at creating as simple a blog app as it can be in order to strip the blog to its bare skeletal state and pay closer attention to its structure. Now, we get to coding.
Step №1. Installing Node Package Manager
The first practical step we take in creating our npm module that will help our back-end’s Node.JS to put modules into place so that it would be able to find them, as well as manage dependencies conflicts.
To install npm from the npmjs.com site, after which you install it and start creating the React Blog app by writing down the following command:
npx create-react-app react-blog
npx is a tool that is bundled with npm. So, by writing the line above you create a new React project that would be named react-blog, as well as a basic React program that will contain node modules, a src folder, a public folder, and a package.json file. After that, we get down to working with the latter and the src folder.
Step №2. Working on src folder and package.json
What we need to understand is that our package.json file would have many dependencies, which secure React’s correct work. But fear not, as our previous step has covered most of this work preemptively. Here is how it should look at this point:
{
“name”: “blog”,
“version”: “0.1.0”,
“private”: true,
“dependencies”: {
“@testing-library/jest-dom”: “^5.11.4”,
“@testing-library/react”: “^11.1.0”,
“@testing-library/user-event”: “^12.1.10”,
“react”: “^17.0.1”,
“react-dom”: “^17.0.1”,
“react-router-dom”: “^5.2.0”,
“react-scripts”: “4.0.1”,
“web-vitals”: “^0.2.4”,
“react-query”: “latest”
},
“scripts”: {
“start”: “react-scripts start”,
“build”: “react-scripts build”,
“test”: “react-scripts test”,
“eject”: “react-scripts eject”
},
“eslintConfig”: {
“extends”: [
“react-app”,
“react-app/jest”
]
},
“browserslist”: {
“production”: [
“>0.2%”,
“not dead”,
“not op_mini all”
],
“development”: [
“last 1 chrome version”,
“last 1 firefox version”,
“last 1 safari version”
]
}
}
Step №3. Creating a GitHub Repository
This step is needed to ensure that you would be able to track all the changes that are going to be made into our React Blog App. What we need to do here is to initialize this new Get Repo that is going to be used in the folder of our project by adding the next line of code:
git init
After that you would need to link it with the GitHub Repository by the command that goes like:
git remote add origin your-repo
What you need to do next is add our previous file to the Git repo that you have initialized earlier by adding the next line of code:
git add -A
And making a commit into the Git repository with the following line:
git commit -m “First commit”
The final thing you would need to do during this step is pushing all your local Git Repositories to the Github repository with the help of:
git push origin master
Keep in mind that the process of working with the GitHub Repository is manual at the moment, which means you would have to add, commit and push (by using the git add, -commit and -push commands respectively) by hand when making any significant changes.
Step №4. Creating a homepage of the React Blog App
To create the homepage for our React Blog App we would mostly use the BlogList component and the useFetch hook.
First, you need to set up the useFetch hook, which would perform three functions for the blog:
1. Holding all the present blogs in your local JSON database;
2. Allowing you to know if the data is currently being fetched and when it is fully fetched and displayed;
3. Storing all the errors that are to be encountered while the data is fetching from the local JSON server.
This piece of code would look the following way:
import BlogList from ‘./BlogList’;
import useFetch from ‘./useFetch’;
const Home = () => {
const {data: blogs, isPending, error} = useFetch(‘http://localhost:8000/blogs’);
return (
<div className=”home”>
{error && <div>{error}</div>}
{isPending && <div>Loading…</div>}
<BlogList blogs={blogs} title=”All Blogs”/>
</div>
);
}
Now we bring our attention to the BlogList component. As seen in the previous piece of coding, we have already invoked this component and it is going to pass in the blogs and titles to be displayed in our Blog App. Now we need to import Link, which would, similar to the anchor tag, help us in the task of linking texts, images, and URLs, although not calling the server, but using the locally saved data. We import Link with the help of the react-router-dom. This stage of the coding would look like this:
import { Link } from ‘react-router-dom’;
const BlogList = ({blogs, title}) => {
return (
import { Link } from ‘react-router-dom’;
const BlogList = ({blogs, title}) => {
return (
<div className=”blog-list”>
<h2>{title}</h2>
{blogs.map(blog => (
<div className=”blog-preview” key={blog.id}>
<Link to={`/blogs/${blog.id}`}>
<h2>{blog.title}</h2>
<p>Written by {blog.author}</p>
</Link>
</div>
))}
</div>
);
}
export default BlogList;
Step №5. Setting up Blog’s detail component
Blog detail component’s goal is to fetch and display single blog posts. That’s why it is important to be careful when setting it up and not forget to call the Blog detail component using a Link passing in the web address and include a blog’s id in the URL as a param. In order to do that we extract the id using the getParams() hook, after which we use the previously mentioned useFetch custom hook to actually get the particular blog entry by passing in the id in the useFetch hook.
During this step, we also set up such a hook as useHistory() in order to establish a history stack, push or pop elements and store the components or visited pages in the history stack. And, finally, we add the function of deleting the blog by adding the button that functions as a handleClick. This part of the process code-wise would look the following way:
import { useParams, useHistory } from ‘react-router-dom’;
import { useQuery } from ‘react-query’;
const BlogDetails = () => {
const { id } = useParams();
const { isLoading, error, data: blog, } = useQuery(‘blogDetails’, () => fetch(‘http://localhost:8000/blogs/’ + id).then(res => res.json()))
const history = useHistory();
const handleClick = () => {
fetch(‘http://localhost:8000/blogs/’+ blog.id, {
method: ‘DELETE’
}).then(() => {
history.push(‘/’);
})
}
return (
<div className=”blog-details”>
{isLoading && <div>Loading…</div>}
{error && <div>{error}</div>}
<article >
<h2>{blog.title}</h2>
<p>Written by {blog.author}</p>
<div>{blog.body}</div>
<button onClick={handleClick}>Delete</button>
</article>
</div>
);
}
export default BlogDetails;
Step №6. Creating the Create Component
Just as the name implies, the Create Component is used to create new blog posts in the app. It would use two hooks:
the useState hook;and the useHistory hook.
The coding for this part would look as follows:
import { useState } from ‘react’;
import { useHistory } from ‘react-router-dom’;
const Create = () => {
const [title, setTitle] = useState(”);
const [body, setBody] = useState(”);
const [author, setAuthor] = useState(‘Shubham’);
const [isPending, setIsPending] = useState(false);
const history = useHistory();
const handleSubmit = (e) => {
e.preventDefault();
const blog = { title, body, author };
setIsPending(true);
fetch(‘http://localhost:8000/blogs’, {
method: ‘POST’,
headers: {“Content-Type”: “application/json”},
body: JSON.stringify(blog)
}).then(() => {
setIsPending(false);
history.push(‘/’);
})
}
return (
<div className=”create”>
<h2>Add a New Blog</h2>
<form onSubmit={handleSubmit}>
<label>Blog Title</label>
<input
type=”text”
required
value={title}
onChange={(e) => setTitle(e.target.value)}
/>
<label>Blog Body:</label>
<textarea
required
value={body}
onChange={(e) => setBody(e.target.value)}
/>
<label>Blog author:</label>
<select
value={author}
onChange={(e) => setAuthor(e.target.value)}
>
<option value=”Shubham”>Shubham</option>
<option value=”Satyam”>Satyam</option>
<option value=”Anmol”>Anmol</option>
</select>
{!isPending && <button>Add Blog</button>}
{isPending && <button disabled>Adding Blog</button>}
</form>
</div>
);
}
export default Create;
Step №7. Finalizing the useFetch hook
We have already set up our useFetch hook and now it is time to make small adjustments and additions for it to fit our React Blog App like a glove. What we mean by that is setting up useState and useEffect hooks.
The useState hook is responsible for setting up three hooks in this case:
· data, which would be an empty array by default;
· sPending, which we are to set to true;
· and error, which we would set to null.
By using our own local JSON server we rid ourselves of the ability to see the loading effect on the homepage. For that, we are going to use the setTimeout function in order to delay the fetching process.
And as for the useEffect hook, we would use an abort controller stored inside, as well as the timeout function for data fetching using the URL that we have received from other components when this hook was called. What we need to do here is wait for the response from the server and see, whether the response is positive or negative:
· if the response is negative, we mark it as an error;
· if the response is positive – we’ve got the data.
After we’ve got the date, we need to set it in our data variable, set the error variable to null and set isPending to false.
The piece of coding needed for this whole step would look like this:
import { useState, useEffect } from ‘react’;
const useFetch = (url) => {
const [data, setData] = useState([]);
const [isPending, setIsPending] = useState(true);
const [error, setError] = useState(null);
useEffect(() => {
const abortCont = new AbortController();
setTimeout(() => {
fetch(url, { signal: abortCont.signal })
.then(res => {
if(!res.ok)
{
throw Error(‘Could not fetch data for that resource’);
}
return res.json();
})
.then((data) => {
setData(data);
setIsPending(false);
setError(null);
})
.catch((err) => {
if(err.name===’AbortError’) {
console.log(‘Fetch aborted’);
}
else {
setError(err.message);
setIsPending(false);
}
})
}, 5);
return () => abortCont.abort();
},[url]);
return {data, isPending, error};
}
export default useFetch;
Step №8. Setting up the leftover components
The next step in the creation of the React Blog App would be to create such components, as:
The Navbar component;The NotFound Component;The App Component;Index.css;Index.js.
We set up the Navbar component in order to display the navigation bar in the App. It is rather easy, as it is only going to have two links: the Home link and the Create Blog link. The coding for the Navbar component would look like this:
import { Link } from ‘react-router-dom’;
const Navbar = () => {
return (
<nav className=”navbar”>
<h1>React Blog App</h1>
<div className=”links”>
<Link to=”/”>Home</Link>
<Link to=”/create”>Create Blog</Link>
</div>
</nav>
);
}
export default Navbar;
The NotFound component is needed to display the 404 Error page. It would be a simple 404 Error page with a heading displaying 404 error, a text saying that the page was not found, and a link to the homepage. The coding for this component would look like that:
import { Link } from “react-router-dom”
const NotFound = () => {
return (
<div className=”not-found”>
<h2>404 Error</h2>
<p>We cannot find that page!</p>
<Link to=’/’>Take me back to Home</Link>
</div>
);
}
export default NotFound;
The App component is needed to bind and interlink all the components together, as it imports all the required components, as well as BrowserRouter, Route and Switch from react-router-dom. The coding, in this case, would look like this:
import Navbar from ‘./Navbar’;
import Home from ‘./Home’;
import Create from ‘./Create’;
import BlogDetails from ‘./BlogDetails’;
import NotFound from ‘./NotFound’;
import { BrowserRouter as Router, Route, Switch} from ‘react-router-dom’;
import { QueryClient, QueryClientProvider } from ‘react-query’
function App() {
const queryClient = new QueryClient()
return (
<QueryClientProvider client={queryClient}>
<Router>
<div className=”App”>
<Navbar/>
<div className=”content”>
<Switch>
<Route exact path=”/”>
<Home/>
</Route>
<Route path=”/create”>
<Create/>
</Route>
<Route path=”/blogs/:id”>
<BlogDetails/>
</Route>
<Route path=”*”>
<NotFound/>
</Route>
</Switch>
</div>
</div>
</Router>
</QueryClientProvider>
);
}
export default App;
Index.css, as the name implies, is a CSS file needed for the design of our React-based Blog App. And as the design is the most subjective part of the whole process, we would present you with the utmost freedom in creating it.
Index.js, on the other hand, is quite fixed in its coding, as it is the index file that serves as the starting point of our application. Here is how it should look:
import React from ‘react’;
import ReactDOM from ‘react-dom’;
import ‘./index.css’;
import App from ‘./App’;
ReactDOM.render(
<React.StrictMode>
<App />
</React.StrictMode>,
document.getElementById(‘root’)
);
And with that, all of our components are set and we get to the final step of the whole process.
Step №9. Setting up the JSON Server
Our final step brings us to setting up a JSON server, which we would use to build a fake REST API. In order to do that, you should use the following command:
npm install -g json-server
After that you need to create the data folder and make a db.json file inside of it, which will contain the following piece of coding:
{
“blogs”: [
{
“title”: “1st blog”,
“body”: “Greetings.”,
“author”: “Author 1”,
“id”: 1
},
{
“title”: “2nd blog”,
“body”: “Hello.”,
“author”: “Author 2”,
“id”: 2
},
{
“title”: “3rd blog”,
“body”: “Hi”,
“author”: “Author 3”,
“id”: 3
}
]
}
After that part is completed, start the server with the following command:
npx json-server — watch data/db.json — port 8000
And that is how you create your own React-based Blog App. It is now possible to start it on any different port and check it out.
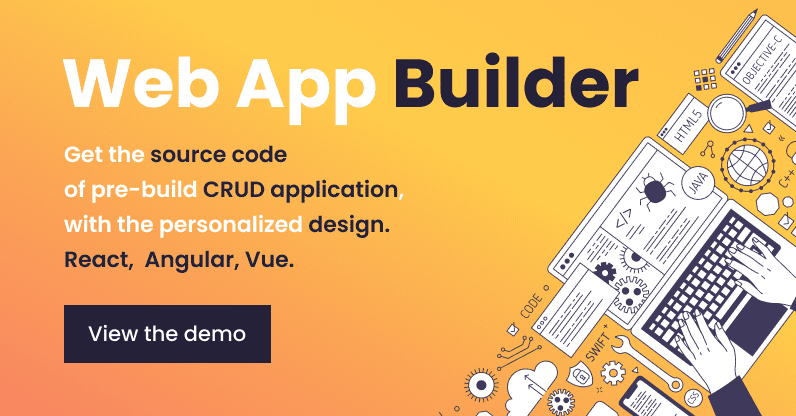
The whole process is not that hard to complete from the technical point of view, it is surely quite tedious in execution due to the number of steps you need to take. But fear not, as there is, actually, a much easier way to create your own Blog App. And by that we mean Flatlogic’s Full Stack Web App Generator, which allows you to build an array of different React-based applications in just 5 simple steps.
How to Create a Blog With Web App Generator
Step №1. Select a name for your App
Step №1 is as self-explanatory as they come. Just write down a name you would like your project to have and be on your merry way to the second step.
Step №2. Choosing your React Blog’s Stack
This step is quite crucial, as here you decide the whole basis of your new app and by that, we mean frontend, backend, and database. For the purposes of this article, we’ve chosen React for the frontend side of the app, Node.js for the backend, and MySQL for the database.
Step №3. Choosing a design for your React Blog App
This step is most pleasing for those, who understand the value of a nice design. And Flatlogic’s Full Stack Web has a wide selection of beautiful designs for you to choose from. For our exemplary React Blog App, we’ve decided to choose the Classic design for its slickness.
Step №4. Creating your React Blog App’s Schema
Step №4 is also one that you would call crucial, as Database Schema is the backbone that will help your Blog App stand proudly and work properly. Luckily, Flatlogic’s Full Stack Web App Generator gives you an array of ready-made Database Schemas that you can use, including a Schema for blogs, which means that you don’t even have to create it yourself!
And this is a fully made high-quality Database Schema as well, as it covers everything from users to comments, as you would be able to see in the following pictures.
Step №5. Reviewing and Generating your React Blog App
And now we come to the final step of the whole process of creating a React Blog App with the help of Flatlogic’s Web App Generator – reviewing and generating the app. All you have to do here is assure yourself that you’ve included and chosen everything you wanted and click the “Create Project” button. After that, you can give yourself a round of applause for a job well done and wait for the final project to generate.
Conclusion
In this article, we have taken an extensive look at the process of building a blog app on React. And if there is an outtake to have, it is the fact that React is quite a handy and efficient tool to do it and you should definitely consider it as a tool to build your next blog, be it a separate project or a part of the project.
Have a nice day and, as always, feel free to read up on more of our articles!
The post Build a Blog on React: Step-by-Step Guide With Examples appeared first on Flatlogic Blog.